 Using mix automation for more than just volume.
In this article I want to share with you how I used automation for my award winning mix of Bo Bice's song November. This mix was done for the Sennheiser/Nuemann Bo Bice mixing competition, which was judged by a panel of top producers/engineers, including: Al Schmitt, Tom Young, David Thoener, Karl Richardson, Tim Palmer, Greg Lukens, and Cool & Dre. We were given the tracks for three different songs that they recorded for Bo Bice, and we were allowed to choose which song we wanted to mix and submit for the competition. I liked the song November the most, and knew I could do a great job of mixing it.
The track is unreleased as of this writing, and I'm not sure if my mix will be used on Bo's next album. So, until I get permission, I can't post the mix audio. However, the purpose of this article is to show you some more creative ways to use automation to make a mix come together, and we don't necessarily need to hear the audio to grasp the concepts.
UPDATE: Just got permission to post, so you can now listen while reading:
First, let's start with a bit of history. In the "old days", we used analog mixing consoles, and any automation they might have was usually an add-on system that only did volume and mute automation. Any other kind of changes in the middle of the mix had to be done by hand. If you had mixes that required complex changes for different parts of the song, you often had to enlist the help of other band members or studio staff to be extra hands to make everything happen at the right time. Or, if you had enough channels and wanted to drastically change the sound of a track from one section to the next, you would "mult" the output of the track to a second channel on the board that you would set up with different EQ and processing, as needed, and then automate which channel played for which sections of the song using the mute automation on the console.
These days, with modern DAW software, you can automate pretty much every aspect of the mix, including the parameters of plugins. This is something that many people don't take enough advantage of when mixing a complex song.
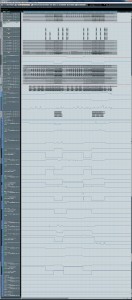
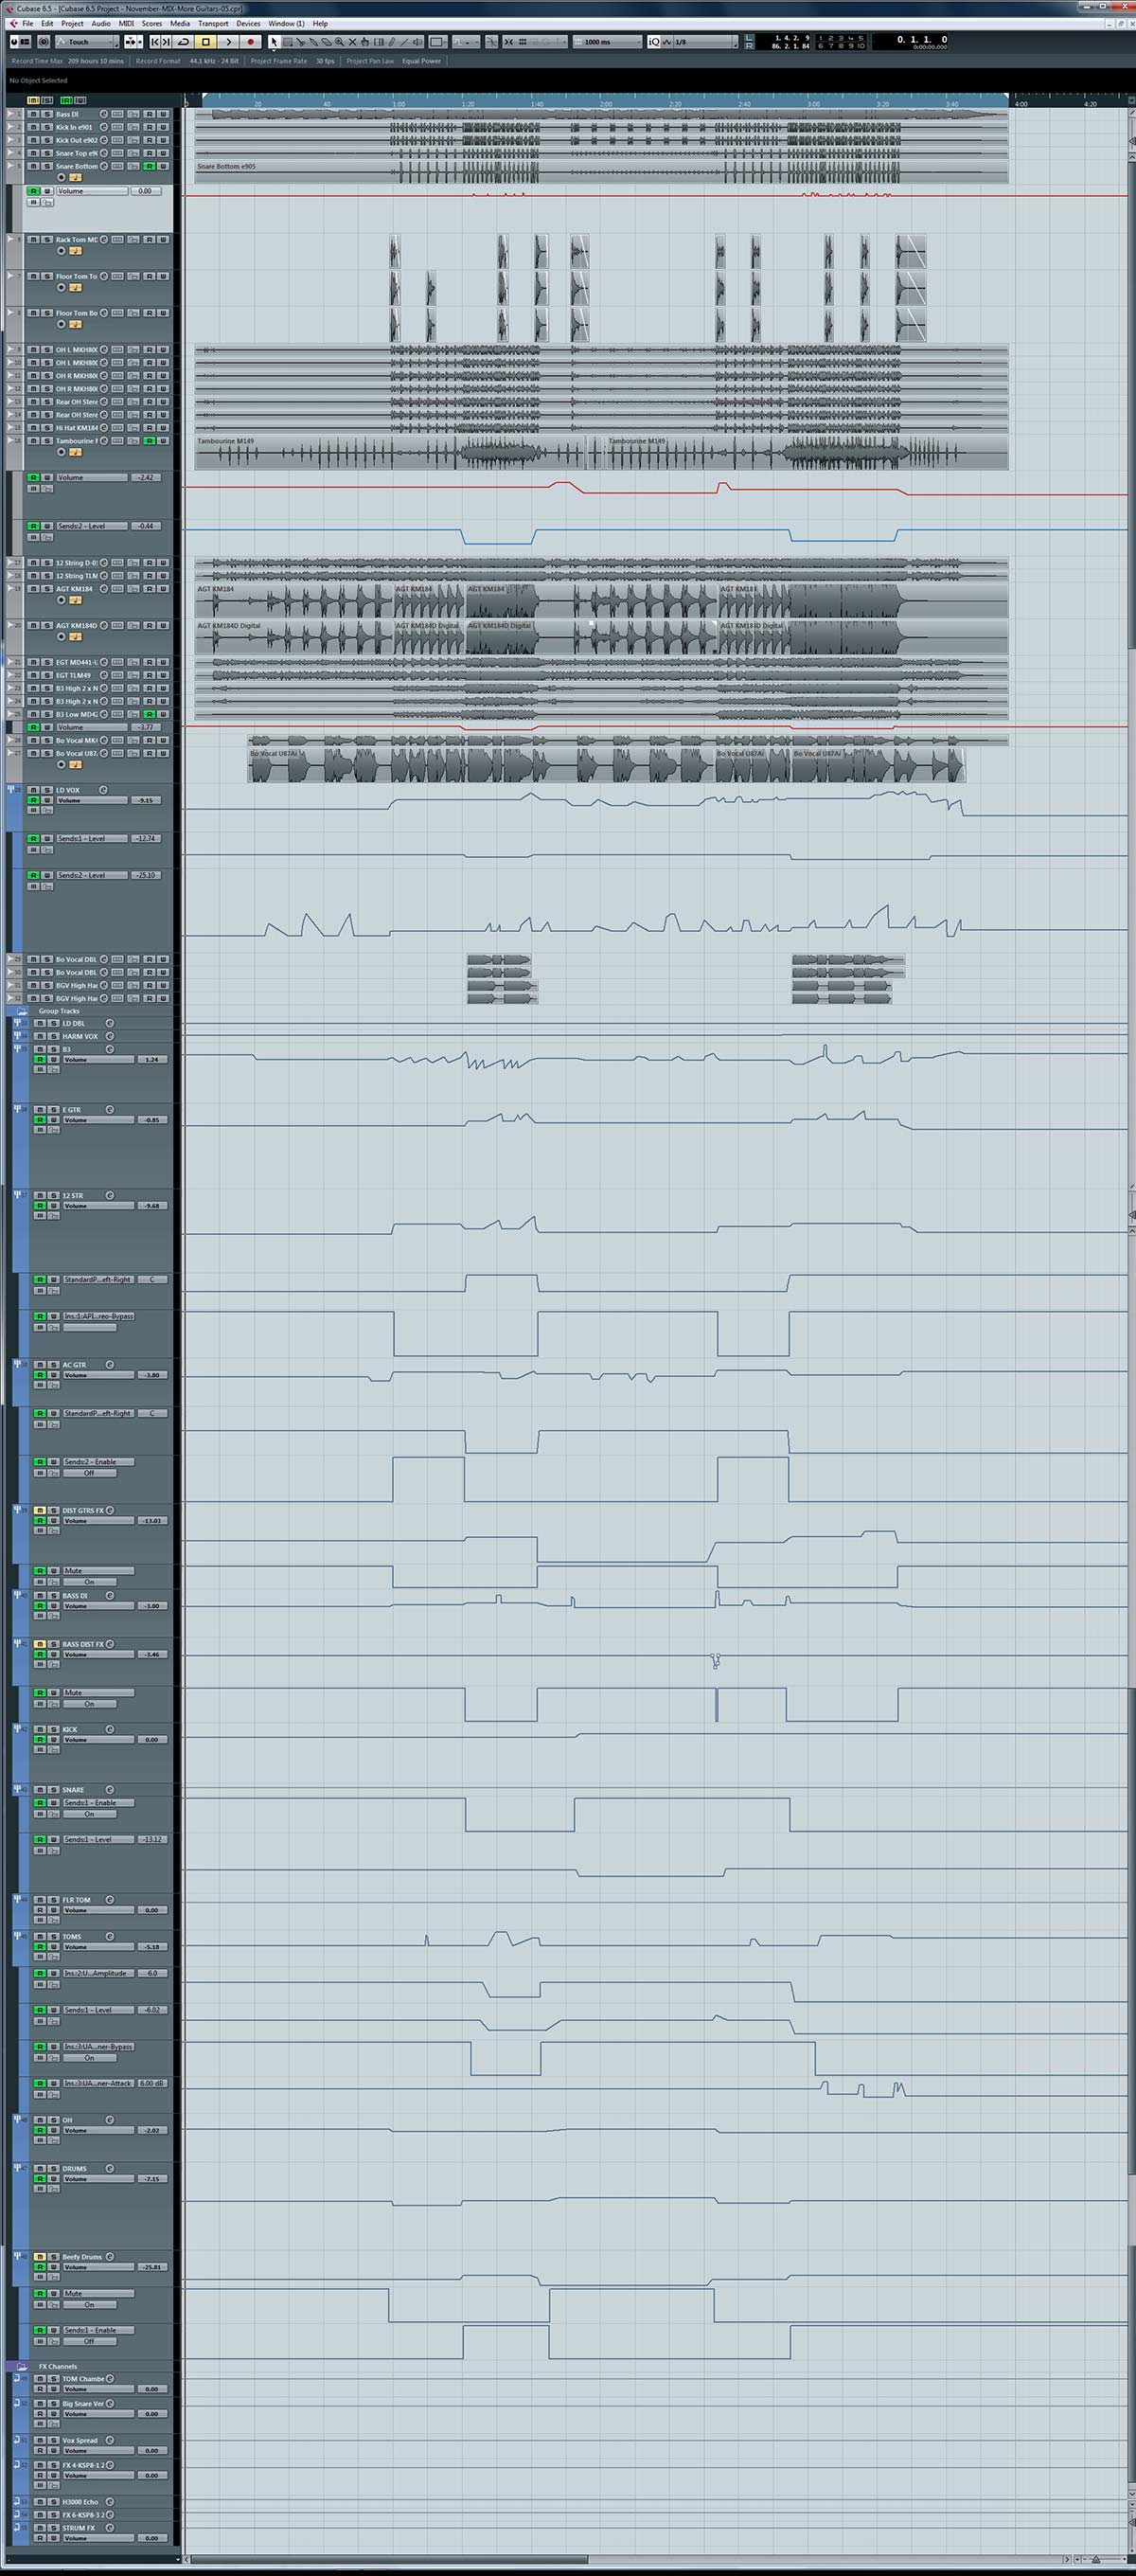
So, let's go through the tracks for my mix of November, and take a look at how I used the automation. If you click on the thumbnail of the screen grab (it's actually 3 screen grabs pasted together so you can see everything), and then zoom in, you can see my automation curves for all the channels that used automation. Let's start at the top and work our way down.
The first track with any automation on it is the Snare Bottom track. It's hard to see with the zoom level of the red automation line, but I was riding the volume up between loud snare hits in the chorus sections to bring out some of the snare drags the drummer was playing. Volume automation is the most standard use of automation, and doesn't require much explanation, except that sometimes it's these little details that can make a big difference in the sound of your mix.
Right below the Snare Bottom track you'll see the three Tom tracks. Instead of using automation curves to bring the toms up or down, or using gate type plugins, I simply isolated the tom hits and deleted the rest of the tom tracks where there were no tom hits. You can also see I did little fade outs on the ring of the toms to smooth the way they fade out. What's not so obvious is that I also used Cubase's clip volume feature to raise or lower the volume level of individual hits to smooth things out even more, or bring out the softer hits without using volume curve automation. Those Tom tracks are all bussed to a Tom Group channel further down the page that has some more automation trickery happening, which I'll discuss as I work my way down to them.
Next one down the page is the Tambourine track, which has two automation tracks. The first is the standard volume automation (in red). Below that is the Sends2-Level automation. Send2 was going to a big reverb. In the slower sections of the song where you can see single tambourine hits spaced further apart, I had a good amount of reverb on the track. But, as we get to the chorus section where it's playing a faster rhythm pattern, I pulled the send level to the reverb WAY down, otherwise it would have been too washy and would have cluttered up the chorus. If you look close enough you can also see a couple of edits I did in the second verse to move a couple of tambourine hits that were not lined up very well with the beat and created a flam with the sidestick snare in that section.
Next down is the B3 Low track. There were 3 microphones recorded for the Leslie cabinet on the B3 organ. Two for the high end rotor, and one for the low. It's a bit hard to see since that track is fairly squished, but I pulled down the low track quite a bit on the choruses. Everything gets louder and fuller during the chorus, and it can get cluttered and muddy very easily, so you often have to find ways to thin things out a bit to make them all fit together. For a song like this where the verses are very sparse, you don't want to thin tracks out for the whole song, so you need to use automation to change the sound for different sections. For the B3 organ is was just a matter of pulling some of that low end microphone down a bit during the choruses to make some room for everything else that happens in the chorus, but still leaves the organ more full sounding in the verses. As we move down into some of the group tracks, you'll see how I used other types of automation to make other tracks fit together better in the choruses.
Next we get down to the blue colored group tracks. I do a lot of my work on group tracks, especially if there is more than one microphone for an instrument. I'll route them all to a group track and then do most of the processing and automation on the group tracks. Often those group tracks then feed other group tracks. For example, many parts of a drum kit will get their own group tracks (such as kick, snare, toms, overheads, rooms), and then all those group tracks will get routed to one master drum group channel.
However, first up in our group tracks is the lead vocal. This is kind of rare for me since the lead vocal is usually just a single microphone recorded to a single track, and so I'll do most of the lead vocal work on that track instead of sending it to a group track. But, for this song, they recorded Bo Bice's vocal with 4 different microphones simultaneously, which was actually nice because it gave me 4 different vocal sounds to play around with. At first I was going to use one microphone for the verses and then a different one for the choruses, but after some experimentation I liked the sound of using two of the microphones throughout the whole song. I ended up liking the vocal sound from the U87 and the MK4 the best. The sound was very similar between those two microphones, so I used them both, and panned one a little to the left and the other a little to the right, just to give the voice a touch of width and motion, without it being distracting. So, those two microphone tracks got routed to one LD VOX group track, which is what I used for all my processing and automation.
For the LD Vox, I only used 3 automation tracks. The top one is the volume automation. The second one is the send to the main vocal reverb, which I just pulled down a bit in the choruses. The third automation track for the LD Vox is the send to the vocal delay/echo. You can see that I did quite a bit of automation on that. Sometimes it was used to make an audible echo on certain words. Most of the time, the echo/delay was at more subtle levels and used more to give the voice some ambient space, and then I would ride it up on the end of sustained vocal notes to let those notes ring out a bit longer.
So, that's another very common use of automation... automating the sends to effects. It works really great if you just want to make certain words echo. Usually if I want a really obvious repeating echo for certain words, I'll just set up a separate appropriate delay/echo just for those echoes, and then instead of automating the send level to that delay, I'll have the send level preset to exactly where I want it and then automate the send enable/disable. For this song, though, I didn't want any huge obvious echoes/delays and set up a more subtle delay that I kept on throughout the whole song and then just brought the send level up and down as desired.
The next group track is the HARM VOX track which really doesn't have much going on at all. Those harmonies only came in during the choruses and once I got a good balance for the first chorus, I just bumped them up slightly for the second chorus (if you look close enough you can see that slight bump in volume automation).
Below that is the B3 group track, which is the group channel for all 3 of the B3 microphones. This is the track where I did most of the work for the B3. It's all volume automation there. As you may recall, I already automated the low B3 microphone, pulling it down a bit in the choruses to thin out the low end of the B3 in those sections. But, on this group track, I'm riding the overall volume of the B3 quite heavily throughout the song. Even though the B3 player was already doing his own volume with his volume pedal, I wanted to exaggerate that to give the B3 even more dynamics, and to work it more around the vocals and other important lines from other instruments. That's a big part of making a great mix, is enhancing dynamics and movement through automation.
Below the B3 groups is the Electric Guitar (E GTR) group channel. Here again, it's just volume automation. Not as heavy as I did with the B3, but still some volume rides here and there to bring out certain guitar parts. This is my "clean" E-GTR track. I actually did another trick with the guitars to make this mix work better, which will see in a few more group channels below.
Next is the 12 String acoustic guitar track. This one needed a bit more automation wizardry to make it work in the mix. In the verses there wasn't a lot happening, and so I wanted to keep a pretty full 12 string guitar sound. However, in the pre-choruses and choruses, things get quite busy and dense, and I found if I wanted to hear the 12 string, I needed to thin out the low end from it, and add some high end to emphasize the strumming and to let it cut through without muddying up the whole mix. The third automation track for the 12STR group is the bypass on an API plug-in EQ. When the line is at the top the bypass is active, so the EQ is off. When it drops down to the bottom, the bypass is inactive, so the EQ is ON. You can also see that when I got to the chorus the second automation track for the 12STR is the pan position, and I moved the 12 STR off to one side of the mix (with the other acoustic guitar getting panned to the opposite side).
So, this demonstrates a use of automation that many beginners don't think of. Usually when you are mixing, you first try to get an overall sound for everything that works together... working on EQ and compression and such for each track. Once people get that dialed in to where it sounds pretty good overall, they tend to leave things like EQ and compression alone, and focus on automating levels and effects. This song is a perfect example where what works good in one section of a song doesn't work well for other sections. The drums don't play in the first verse, and are very sparse in the second verse. In general, for this song, there is a LOT more space for instruments to be big and full in the verses than there is in the pre-chorus, and especially the choruses. So, I ended up automating EQ on several tracks, amongst other things, to get everything to fit together better in the busy sections where it was simply too crowded to make every track sound big and full on its own.
Below the 12STR group track is the AC GTR group track. This is the other acoustic guitar. Here I didn't need to automate the EQ, but I did ride the volume, and also moved it to the opposite side of the stereo field (from the 12STR) during the choruses to get those acoustics out hard left-right for the choruses. The third automation track here is a simple enable/disable send to a "strum effects" track I had set up for the pre-choruses. This acoustic guitar just had some big sustaining strums in the pre-chorus, and I wanted to bring those out with some special reverb/delay effect I had set up. So, I got my levels set up for it, and then just turned on the send to that effect only for the pre-chorus.
Below the AC GTR group track you'll see one of my special extra group tracks that I set up called "DIST GTRS FX". The EGTR for this song was recorded fairly clean, with just a very small touch of crunch on the guitar track. It worked really well the way it was recorded for the verses, but I wanted to give the song a bit more power and edge during the pre-chorus and chorus sections. So, I created a second group track which is fed from a send from the EGTR group track. On this track I used a distortion plug-in to add a bit more distortion to the electric guitars for those sections of the song. I didn't replace the other group track, but rather just blended this new FX track in with the other EGTR group track. I could have done it just as easily on a FX track instead of another Group track, but Cubase is flexible in that you can do sends to group tracks as well, and this was more than just reverb, delay type effects that I usually use FX tracks for. You can see the two automation tracks for this. Volume at top, and the second one is the channel mute for the group. The cursor in this screen grab is in the verse part of the song, so you can see that the "m" is lit up because the group track is currently muted. This really helped fill out the choruses and give them more power.
The next two group tracks are for the Bass. There is the Bass DI group track, which is just where I routed the Bass track so I could work on the automation for it down in the group section where I was doing most of my work. Right below it you'll see a BASS DIST FX track. This is exactly the same type of thing that I did for the electric guitars. I created a distortion effect for the bass, and put it on its own group channel and only brought it in for the choruses to give the bass some extra bite to cut through a bit more. If you look closely, you'll see there is one other small spot in the song right at the start of the second pre-chorus where I turned on the distorted bass fx track (but with the volume automated at a lower level) to help bring out one cool bass slide that he does along with a low tom hit. Otherwise, this track was pretty straight ahead in that I just turned it on for the choruses and then turned it off everywhere else. Didn't need to do any more automation that that. The main Bass DI track above it has a bit more volume automation to highlight some specific bass lines and to just build with the overall dynamics of the song.
Next we start getting to the individual drum group tracks. There is a Kick and Snare group that combine the various microphones for each of those kit pieces. Kick drum has some pretty subtle automation to bring it up a bit for the second half of the song. The Snare drum group has some automation for its reverb send. Like the tambourine, I used a bigger reverb for the sparse verse sections and pre-chorus sections to make those hits stand out, but then turned off the reverb in the much more busy chorus where it would have been way too much.
The TOMs group channel has a lot going on. Besides some extra volume automation to help bring out some tom hits, there were several other things I had to automate on the toms to make them fit in different parts of the song. Right before the pre-chorus kicks in both times, there's a big tom hit. I set up the toms to sound huge for that, but then they were too big for other parts of the song. So, there is some EQ automation going on to pull back the low end of the toms in the busy chorus sections. However, that by itself wasn't enough, and there were also some places where I needed more attack on the toms to get them to cut through without cranking them up super loud. So, I also had a Transient Designer inserted on the group channel, and I automated the attack and sustain parameters of that to help shape the sound as needed for different sections. Plus, there is also the reverb automation that is similar to other tracks... bigger reverb during the pre-chorus, but then pulling it way down in the choruses.
Below that is the OH group channel, which is the drum overhead microphones, which only required a bit of volume automation to adjust their level within the overall drum sound for different sections.
Below the OH track is the overall DRUMS group channel track. This is where ALL the other drum group channels go, so I have one group for my overall drum kit level. Here it's just some overall drum volume automation, as most of the detailed work has already been done on the other group channels for pieces of the drum kit.
However, one last special track below is my "BEEFY DRUMS" group channel track. This is another little trick I use to help gives drums a bit more punch in certain sections of the song. This track will usually just be kick, snare, and toms only, which I feed from sends on those respective group channel tracks. This group will then have some special insert effects, depending on what the song needs. It's usually some more transient designer to punch up the attack a bit, and then usually some heavy compression and a touch of distortion as well. This is then just brought in where the drums need a little extra punch and blending in with the other drum tracks. You can see from the volume automation that the volume for this is kept very low... it's just blended in slightly and not used as the main part of the sound. Just enhances the sound a bit. The second automation track for it is the mute, and you can see it's only used on pre-chorus and chorus sections of the song. Also, you may recall that I had some big reverb on the snare and toms groups for the pre-choruses, but I switched those off for the choruses. Here on this BEEFY DRUMS groups I have a send going to a shorter room reverb, and I turned it on only for the chorus sections. So, this BEEFY DRUMS groups is also used to create just a touch of room reverb during the choruses.
Finally at the bottom are my effects channels. These are my reverbs, delays, vocal spread effect, and a few other things. No automation was used for these as they are just the FX returns, and my automation was done using the sends to these. That's usually the way I work. I automate the sends to the effects, and leave the returns at a fixed level 90% of the time. There are occasions when I may need to automate something on the effects returns, such as EQ to thin out a reverb during some sections, or maybe fade out an echo with huge amounts of feedback, but none of that was needed on this song.
Hopefully in the future I'll be able to share the audio for the mix, at which point I may do a video walk through. In the meantime, perhaps this gives you some ideas on how to improve your own mixes.